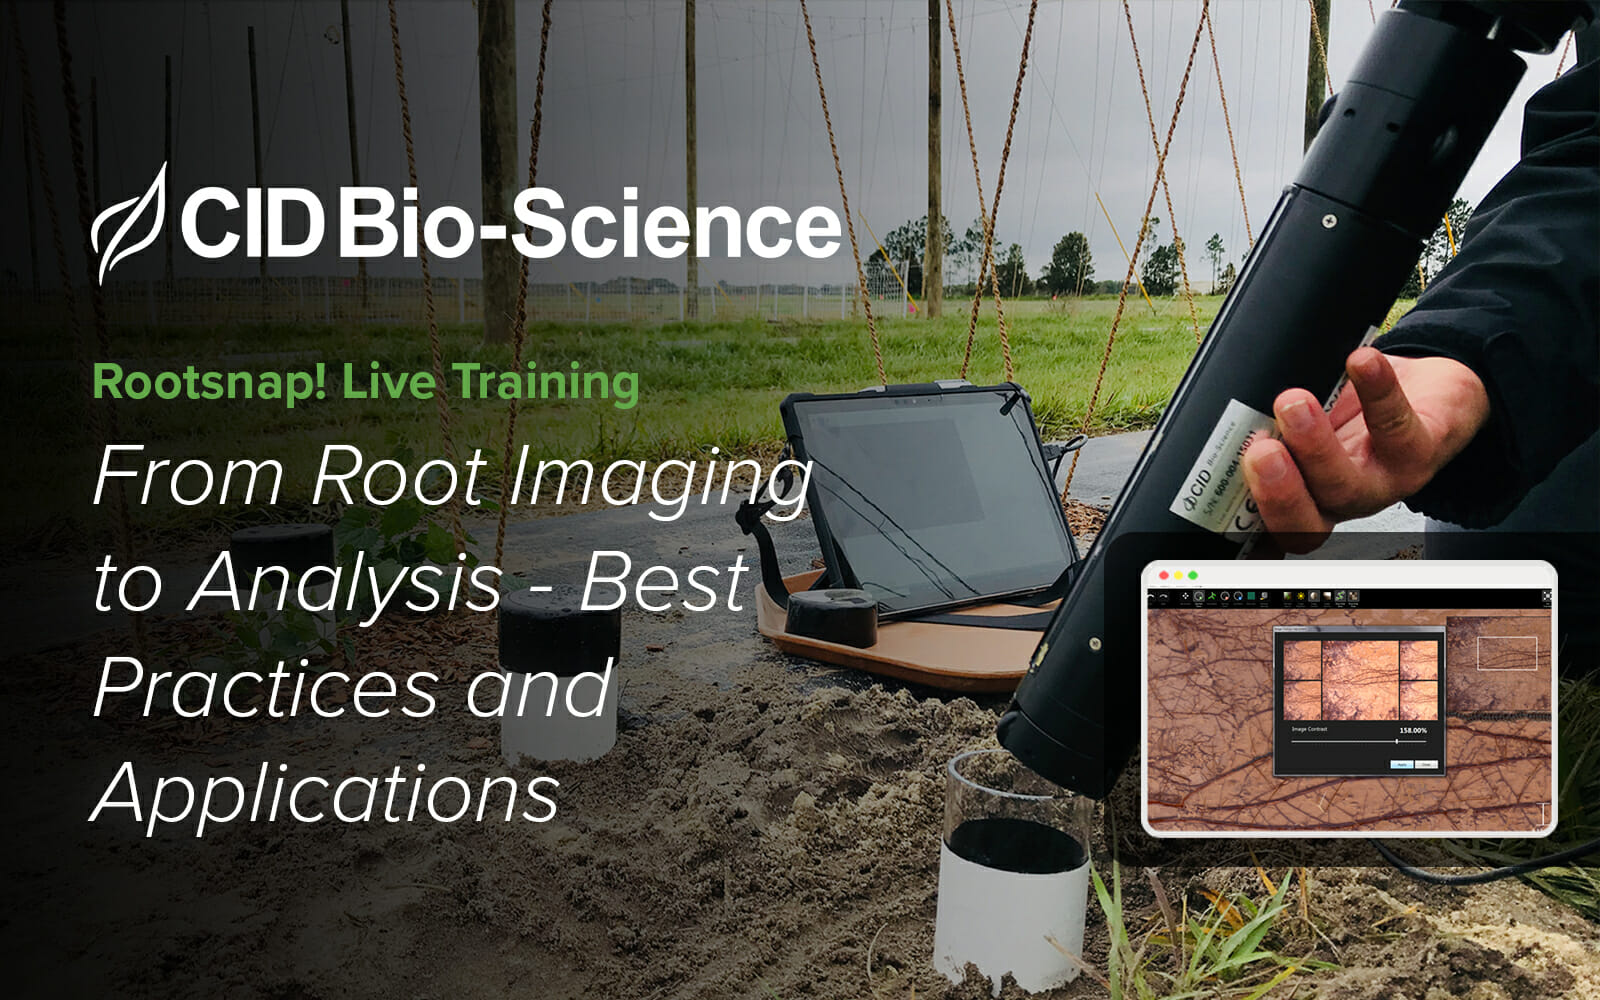
RootSnap! Webinar: From Root Imaging to Analysis – Best Practices and Applications
Hunter Weber
March 7, 2023 at 4:21 pm | Updated April 15, 2026 at 4:02 am | 33 min read
Request a quote | Schedule a consultation
Join us for an in-depth exploration of RootSnap!, the effortless root analysis software from CID Bio-Science. Many plant researchers are having a problem today of being unable to see what’s going on with their crops below the surface without destroying the crop. This software, combined with a root imager, allows for exploration underneath the surface nondestructively! By watching this webinar, you’ll get best practices for image collection and processing and insights into the applications of root image analysis in research and agriculture.
Subscribe to receive our monthly round-up of articles.
Whether you’re a researcher or an ag-tech professional, this webinar will help you unlock the full potential of root analysis. View the full webinar below to explore this topic fully!
These are the topics that this webinar covered:
Part 1: Setting up your project and importing pictures with RootSnap!
Part 2: Drawing out root systems and accurately adding points (something like this)
Part 3: Time series case study and data export
A live Q&A session was held following the webinar.
Request a quote here:
Early Bird Info on the CI-610 Autonomous Root and Soil Imager Here:
Webinar Transcription
Introduction
Okay. Welcome everyone to our RootSnap! webinar. Before we start today, I to go over a few housekeeping things. Our moderator today will post links in the chats as I talk about places to find more information or receive quotes or pricing. If you have any technical difficulties or there’s something wrong with the presentation, please put those in the chat box. But if you have questions about the material or the presentation, please put that in the Q&A section. So the Q&A tool is right next to the chat on the screen. Please do not put any questions in the chat box; I cannot see them. I can only see them if you put them in the Q&A section. So like I said, welcome to our RootSnap! webinar.
Speaker Introduction
My name is Kendra Ellertson. I’m currently an application scientist here at CID Bioscience. I have my bachelors in biology from Chapman University, where I worked in a plant physiology lab for three years. And I researched how the quantity and quality of light affects tomato plant growth. I also have experience in the indoor vertical farming industry and have been with CID Bioscience for over a year.
Importance of Studying Roots
So let’s get right into the importance of studying roots. So first of all, the importance of studying roots; it gives us a holistic view of plant health. Half of a plant’s biomass is underground, so we can start to understand how this below-ground biomass interacts with the environment and actually contributes to the growth and productivity of the entire plant. By looking at root systems, we can also track changes in nutrient uptake since root systems are the main pathways for water and nutrient uptake. We can start to understand how plants absorb nutrients from the soil and interact with that below-ground environment. We also can detect early stress and disease. So instead of only being able to see that above-ground biomass and track those changes, roots can show signs of stress before shoots and leaves can. And so growers and farmers can get on finding solutions for those stress and disease issues if they can look at the root systems. And also, root health is related to overall yield. So a better root system will be directly related to biomass production and better quality of your plants.
CID Bio-Science’s Line of Root and Soil Imagers
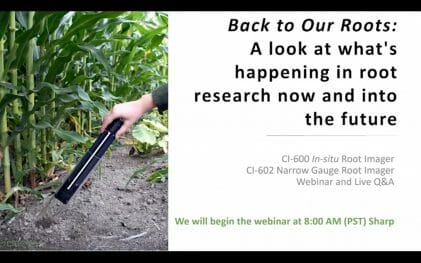
So at CID Bioscience, we currently have a line of root and soil imagers. We first have our CI-600, our in-situ root and soil imager. And this device is supposed to be in the ground. So we have clear plastic tubes installed below ground or in your laboratory’s planter or pot. And then this device slides right into that clear acrylic tube. So these devices light up, illuminate along the entire length of the device, rotate 360 degrees, and give users a visible image of their root systems. Our CI-600 can go up to 600 DPI in image resolution. And I’ve included some pictures on the left to give you an idea of the different soil types and root systems these devices can measure. We also have our CI-602. This is our narrow gauge root and soil imager. These devices are similar, pretty much similar, except the CI-602 has a smaller diameter. And also can go up to 1200 DPI in image resolution. Both of these devices are meant to be placed in clear acrylic tubes below ground or, as I said, in pots or planters in your lab. Both rotate 360 degrees and give you that visible light image.
Introducing the CI-610 Autonomous Root and Soil Imager
Along with our CI-600 and CI-602, we are introducing our CI-610 Autonomous Root and Soil Imager. So this device has not yet been released. We’re still figuring out how all the components will fit together, making sure we can give users a really good image quality and fit all of the tools and features we want into this device.
But to give you guys a little summary and an introduction to this new release, this CI-610 will be a completely nondestructive and super portable device for below-ground imaging. It’s also going to utilize UV and NIR wavelengths as well. So unlike our CI-600 and CI-602, which only use visible light, this device can also use UV and NIR. It will also be completely wireless. So with the 600 and the 602, it does require a cable to be connected to your laptop or tablet for operation. But the CI-610 will have a remote operation, which means you can use it from your mobile device, where you can tell the device when to start traveling down the tube, and what images to take at what intervals. Also, you can send and save tag all your images on your phone. It’s also going to possess the capability to do video capture as well as image processing. So when you start the device from your phone, the device will illuminate at the bottom, and it will travel autonomously down the tube, and as it’s traveling down the tube, it’ll be taking a video. It’ll detect that it’s at the bottom of the tube and reverse and start to go back up the tube, and that’s when it will do its image processing. And then, once it reaches the top, you’ll see those images and videos on your phone. Check the links in the chat box for early bird pricing info to be updated on when we release this product. And we also are looking for beta testers. So when we release this device, check out all those resources on our website.
Real-World Users
I wanted to talk about real-world examples of people using our root and soil imagers. So quickly, we have Dr. Lorenzo Rossi, who is at the University of Florida, and he’s using our CI-600 to determine optimal nutrient concentration for citrus under HLB-endemic conditions. We also have Dr. Elmi Lotze, who’s at Stellenbosch University, and she was looking at how plant nutrition and climate change affect root dynamics across many species. We also have Dr. Rao, who’s at Agricultural Victoria Research, and she’s examining pulse root system architecture. She’s examining differences in pulse root system architecture for trait selection specifically. So with all these users, once they’ve taken their images with the CI-600 or 602, they need to analyze them. Having visible images is one thing, but getting data from those images and determining the density and mass of your root systems is important. Luckily, we have software to do just that.
Rootsnap! Software
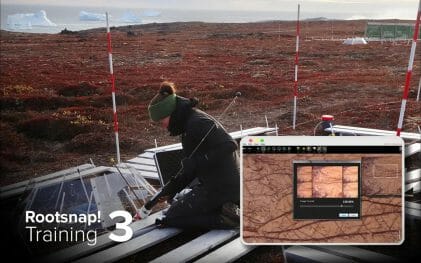
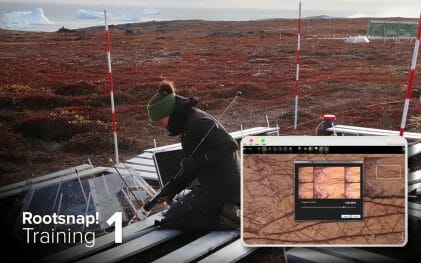
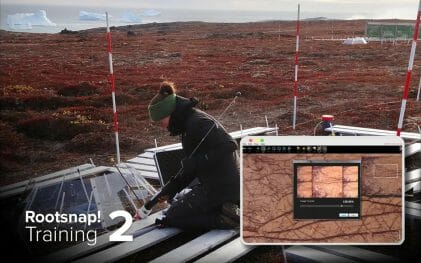
To give RootSnap! an introduction. It’s on our website for download. So if you want to follow along in the next part with me, you can download that from our website. But with the RootSnap! software, you can upload any image into the software. And by tracing out your root systems, you can get root length, area, volume, diameter, branching angle measurements, etc. You’ll also see average values for specific tubes, root systems, or singular root systems. It’s a very intuitive and easy-to-use interface. We’ve ensured that all of the tools and buttons on the software are very clear and easy to use. Some cool feature of this software is we have a time series analysis feature. So users come back in different weeks, months, and growing seasons to analyze and track changes in their root systems. Tracing out these root systems takes quite a bit of time. And so we’ve added software that if you take an image in week one and trace on all of those root systems, you’ll be able to overlay those roots that you’ve already drawn out onto your next picture. So you don’t have to go back and trace out that root that you’ve already done. You can add to your project. We are in the process of making this software fully automated. So like I said right now, the user does have to trace out all of their root systems, but we’re in partnership with an AI company to hopefully make this fully automated. So it will trace out all of your root systems and do all the analysis for you, which would cut down on time. So now we will go into a live training of the RootSnap! software. I’m going to switch my screen to our RootSnap! program and I’ll walk you through all the tools and features of that software.
Using the Software
So here is our RootSnap! software. This is what it looks like. When you open the software, you have your blank canvas and project to start. The first thing I always recommend is going ahead and saving your project, saving that to whatever file or folder system you can easily find later. With this software, you can add multiple tubes. So let’s say you’ve started a project for your Apple orchard; you can add all of your tubes to that Apple orchard right here. So you don’t have to do multiple projects for multiple tubes. If you want to add a new tube, you can click this plus button, and this drop-down will show you all of the tubes you have. You can easily delete them with this button here. We also have this Sessions tool here. So this is great, like I said, for that time series analysis. If you want to track the progress in your root systems over time, you can add multiple sessions. And I’ll be showing you a little bit about this later. I will show you an example of what a time series analysis would look like and how to overlay the root systems.
With all these boxes, you can start importing your pictures in this window section. So for each tube and session, you will only want to add the pictures from a single tube. So I will go ahead and click into this box, and it will pull up my file explorer here. And I’m just going to add some pictures. To move the picture around and zoom in and out, I use the pan and zoom tool and the cursor on my mouse to zoom in and on the picture and move the picture around. Before I start tracing out any roots, I want to ensure that I can easily see my roots and that there’s a good contrast between soil and roots. So I will use these tools up here to adjust the brightness and contrast of my image before I even start tracing out anything. So you can use this toggle at the bottom to adjust the brightness. This middle section is what your actual picture will look like, but we’ve added some examples of different brightness levels that you can easily click, which will apply. So I’ll show you here. If you want to click this one, click it. It will apply that to the main picture, and then you click apply. And if you have multiple pictures in your windows down here, you will want to adjust the brightness and contrast for all of them. Again, to ensure you contrast that soil and root system. And I will do the same thing with my contrast to ensure I can see them.
So to start adding and drawing out root systems, you will want to zoom in on the first section of your picture. So I will zoom in here and ensure I have a good view of where I want to start. And then, I’m going to select this Add/Edit Points tool. So with any of these tools up here, a single click will select the tool, but another click will give you more options. So once I’ve selected this Add/Edit Points tool, I will click again to see these other options. This range tool up here allows me to adjust the size of my cursor. I always suggest starting with a smaller to mid-range size so that you have better control of where you’re placing your roots. I’m going to start with this smaller size down here. I also suggest that you have this Snap To Root feature enabled. So what this does is as you’re drawing out root systems, it’s going to detect color changes between roots and soil and snap your points to the middle of the root, making it easier for all your points to be placed on the root, and so you don’t have to go back and manually edit each point.
Now to start drawing out your roots, you will start at one end of your root, click and hold with that tool, and trace along your root system. And you’ll see those points snap into the middle of the root there. And I’m just going to trace out a few more here. And then, we’ll get into the specifics about adjusting the points. So when you’re drawing out these root systems, you can connect branches to your parent root. So it doesn’t look like this root is connected yet that we can see, but I will show you how to connect that as if it were a branch. So this last point here, I’m going to select it. And as you can see, I can move it around wherever I want. It will snap those roots together if I drag it over another point and let go. And now, as you can see, that is one connected root system. I’m going to zoom in and show you a little bit more about what these points are. So when I zoom in, it will give you a millimeter diameter. I can adjust to these points. And you want to be very accurate here because this is where the software is going actually to calculate the data from these points.
So you want to make sure these points are adjusted properly. You can adjust them in two ways. The first way is to click on one and use the cursor on your mouse to adjust the size. So I’m just scrolling up and down to adjust that size. You can also click on it and move it around if necessary. So that’s one way to adjust the size. Another way is to click the View button, select Panels, and point to details. This panel on the right will show up here, showing you the diameter of all your points. Now, you can select specific points and edit the diameter here. So if I wanted it to be four, it will auto-adjust that size on the picture and in the selected points far over here. I can also shift and select multiple points and choose whether I want the software to estimate that or set it to a specific diameter, or I can even select my own. And it will change all of this. If I make a mistake and need to delete it, I can do it in two ways. So I can right-click with my mouse, and this red cursor will appear. And if I drag it right over my roots, it will delete those. I can also actually click on this tool. And again, I have some more options to change the range. So the size of my cursor here, I will choose the mid-size. As you can see, I can delete it. You also have some more options, so to split root. This is a nice feature when this is enabled. If I hover and delete over where I’ve connected two roots and delete that point that’s connecting, it will split those two roots back into separate ones. I can also choose to remove the entire root. Just like that, I’ve removed all of my roots.
I will draw a few more here to show you some other features. I’m not being very precise right now, but when you do this with your pictures, you’re going to want to make sure that you’re zoomed into the picture so you can very clearly see the diameter and length of these root systems and make sure that your points are directly on the root. So some other features, this Lock Points tool is great if you have a lot of roots that you’re trying to draw out on a picture. You can lock up your points, so you don’t accidentally move or delete them while working on other sections of your picture. So when you select this, you will have this blue cursor. Again, you can change the size of your cursor. I will zoom in to show you this a little bit better. When this point is selected, and I go right over those points, as you can see, a little lock shows up in the middle. Now that means I couldn’t even if I tried to delete them. It won’t be deleted, but this one up here, since it’s not locked, can be deleted. To remove that lock, you can select. Go over those points again with the lock tool to unlock them. So now you can adjust and move them. You can also adjust the color scheme of your roots. So if you select one of your root systems and come up here to root color, we can change the color of any of those we want.
Another feature is this Measure Manually tool. So I like this tool for users who don’t want to use their mouse to adjust the point size of all their points. They can measure the average length of their different roots and then manually add that diameter to all those points here. But this is a quick tool to look at with links just an added feature. So another feature of this software is if you want to revert to your original picture and see what it looked like before you started drawing out all of these colorful roots, this Show/Hide Roots tool up here, if you click it, it’ll take off everything that you’ve drawn out so far. And if you select it again, it’ll put it right back on. So once again, I’m just going to draw out a few more of these systems so that you can see what the statistics will look like at the end of the project. And again, to connect two roots, you’ll select one of those points and hover it over another one, and it’ll connect those. Another feature that we have is this auto-detect feature. So this is great for high-contrast roots that stand out. So with that feature, you will click the add edit points tool and draw a few points at the start of your root. Then you’ll select this auto-detect feature, and it will detect the contrast between soil and roots. And as you can see, it just drew out that entire root for me.
So to start seeing some of the statistics of drawing out all of this root, you can hit this View button up here, click Panels, and click Root Details. And so this is where you’ll see some of those specs for individual roots. So this will show you all the roots you’ve drawn out so far. They’re color-coded and numbered. Every time you draw a connecting root or drag and drop one of the roots over your parent root, it will increment those in decimals. So the parent root will be a whole number like it is here, 16, and then we have our connected root, 161. If I were to add another one, it would say 16.2. As I said, these are all color coded that correspond with what’s on your image. And you can select any of these roots, and the statistics for that will show up on the side here. You can also change the status of that root. So if it’s a new root, alive or dead, you can select any of those here. And as I toggle through the different roots, these specs will change. This branch angle section will be 0 if you select a single root. Once you select a connected root, that branch angle spec will appear. To view the average of the statistics for your picture, again, you can click View, Panels, and this Image Details button. And so this is going to be an average of this entire picture. It’ll give you the total root, area, and average diameter. And then, if you need to close any of these windows, you can select this arrow button, and those windows will pop back to the side.
So now I want to show you how to do a time series analysis. So we will pretend this is the first image I’ve taken with my root imager. There are only a few roots here that need to be drawn out. And I’ll quickly draw out just a few more of these here. Then we can make a new session over in this toolbox by clicking the plus button. That will give us a new session. And here, I’m going to add our, let’s say, week two image. So again, I just clicked on that gray box and will click our week two image, and it’ll pop up on the screen here. So like I said, I have already drawn out some of these root systems in our previous picture, our week one picture. And I don’t want to go back and retrace the root I’ve already traced. So what you can do is you can come over here to this window section, right-click on the picture, and you have this option to migrate root. So if I select this, it will ask me if I’ve drawn anything on this picture. I haven’t, so this doesn’t mean anything to me. But if you’ve already drawn out roots in your picture, click the right selection here. So as you can see, the roots from my previous picture have overlaid on this new picture, but they’re not correctly positioned. So this root alignment tool will show up here, and you can click on the arrows and move your roots to the proper positioning.
So this is a great feature because some of the pictures are just slightly off or slightly adjusted differently when you take the image. So this allows you to move all of those roots at once. So we’ll leave that right there. And then, we can exit this tool. And now, as you can see, we have quite a bit more roots in this picture. So again, I will click my add edit points tool and quickly draw out some of these new roots that have popped up in our week two image. Here, I am going to zoom in and connect these roots. And I’ll quickly draw out a few more. Again, as I said, if you’re doing this with your images, you’ll want to zoom in quite a bit more and make sure you’re adding those points directly onto the middle of the root. And also adjusting those points as well. Okay. So I was able to draw out a few more of the roots. Now we will add another session and move on to our final image, our week three image, where we can see that many more roots have developed and can be seen in our image.
Again, I don’t want to have to draw out all the roots I traced in weeks one and two. So I’m going to right-click and again migrate those roots. This feature will always migrate the root from the previous session. So it will migrate the root only from session two. Again, I will realign these as best I can, close that out, and then draw out a few more so that you guys can see the difference in the statistics when we export the data. Another feature of this software is when you start adding more pictures, it will detect the length of the imager, and it will be able to tell you the depth of your root systems. So if I add another picture from my tube, we’ll add this one as an example. You’ll see that the centimeters up in the top right have changed. So the software knows how long the root image is. And so, each additional picture you’ve taken will increment the centimeter value here, which will be the depth in the soil. You can add your initial window depth here when you import your pictures. So maybe you started taking an image with the image a little bit popped out of the ground, or maybe it was pushed down into the tube a few inches. You can adjust that here so that these depth statistics are accurate when you add new images to your window. You can also adjust the angle at which the tube was. So if it was at a 45-degree angle or something different, you can adjust that here to calculate these depth values correctly. You can also change the default root status to whatever you want here.
So I will reopen a few of these panels so you can see. We’ve increased our total root area by quite a bit with this week’s three images. So if I return to a previous session, you can see different root areas. So once we have completed drawing out our root systems and are ready to export the data, I will save this to my desktop. You do need to save before you export. It might take a few minutes, depending on how many projects, pictures, and tubes you have in your project. Once you’ve saved, then you can click file and export. And it’s going to export as a CSV for you. So I’m going to save this. I’m going to stop sharing my screen, and I’m going to open up that CSV file to show you exactly what that looks like.
So here is the CSV file I opened that I exported to my desktop. You’ll be able to see the date and the version up here. And you’ll see that you have two different tables. So this top table, there will be an average of your sessions. So remember, we had different tubes, different sessions for those tubes, and then we had different pictures or windows within that session. So this table here will give you an average for each session you’re in. And it will give you things like total root count, total root volume, average density, average length, average width, etc. If we scroll down to this bottom table, you can see the actual statistics for each root you’ve traced out. So it will have the same naming convention you saw in the software where a parent root is a whole number. And then, any branching roots are incremented with decimals. It will give you the lengths, diameters, areas, and volumes. It’ll also give you the root and start and end tip angles. And as we scroll down here, you’ll see we have all of the tubes, all of the sessions within those tubes, and all of the windows within those sessions. So you get a lot of data from every single root. And any analysis you need can be done here because you have all of these statistics for the singular root and the entire project. So that was a quick overview and training of our RootSnap! software.
I will head back to our presentation here to wrap up and answer some questions about this software. So to wrap up, I did talk about and introduce our CI-610 Autonomous Root and Soil Imager. This has not been released, but we have links to users looking for more product information or wanting to be on the list for pricing and release information. So we have a link for that. We also have a link for product and quote requests with that second link at the bottom. Additionally, I wanted to let you know that we have a link on our website for product consultations. So if you want to do a 30-minute call with one of our application scientists, you can book a time through the link on the calendar on our website. We can have a 30-minute discussion about any of these instruments, any questions you may have, or talk about the best instrument for your application.
Q&A Section
So now I’ll go ahead and check the Q&A box for some questions and go through some of those. So the first question we have says, I have a CI-602. I downloaded RootSnap! software on your website. However, I cannot use the software to analyze root images. When I open it, it shows that unlicensed copy. How do I download the licensed RootSnap! software? Great question. So in a previous version, the previous release of this software, there was a bug. So when you open the software, a little box that tells you you need a license key pops up. If that pops up if you have an older version and that pops up, you can click ignore and continue, and that box will go away, and you’ll be able to use the software with all of the tools and its full functionality. We did release a new version with a little bit of an updated UI and some added tools and features, which are available for download on our website. If you go to the CI-600 or the CI-602 product page, click product support and downloads. The RootSnap! software is available for anyone to download right there.
Next question from Sam, is it entirely non-destructive? Yes. So when you’re using these root Images, there are two ways that you can install your clear acrylic tubes. The first is that you can preinstall them before you’ve done any planting. So you have your soil and use an auger to drill a hole. You’ll place your tube into the soil, and then you’ll plant your plants around that tube. And the roots will grow around the tube, and you’ll hopefully have a nice image. Another option is to install the tubes into a preexisting garden or orchard farm. And this will be a little bit nondestructive, depending on the angle and placement of your tube. But you’ll augur a hole, slide that clear acrylic tube in, and then that becomes stationary. So you know you don’t need to take it out of the soil. It can stay in your pot, in your planter, or out in the field. It has watertight caps on both ends and film inserts to ensure no moisture or anything is getting inside that tube. So once you’ve installed the tube, you don’t need to move it. And all you have to do is pop off one of the watertight comps, slide the imager right into the tube, and you’ll be able to take your images.
Next question is, can we measure the height of a tree using this root analysis software? So that is not currently possible with any of these instruments. These instruments are meant to be a visible image of the roots below the ground. You won’t be able to get any specs about the height of the above-ground biomass as this is purely an imaging tool, mostly for soil and below-ground root systems. Next question, can it do image analysis of normal JPEG files? Yes. So with this software, you can import any image that you want. It doesn’t have to be from one of our root or soil images. You can upload any image to this software and start tracing out root systems.
Next question, can this tool be used to measure woody tree roots? And what is the depth that penetrates the soil compared to the ground penetration radar, which is about four to six meters in-depth? So these root Images, as I said, come with clear acrylic tubing, and the user can adjust and tell us what size and length of the tube they need. So I believe that our standard tube size right now is about four feet long, but you can make that shorter if you need, or we could try to make it longer. The issue with having it be longer than that is that when you’re using the imager, it has a metal rod at the top that you use to push down into the tube. And we have multiple that connect, so you always have a grip on the imager. We have made it that long so you don’t lose the imager and can get it back out of the tube. As far as how far outside of the tube, you can see an image. As the image is in the tube, it’ll illuminate. You’ll only see roots a few centimeters away from the tube when you get that picture. So anything that’s right around the tube, you’ll be able to see, but nothing farther than a few centimeters away from the actual tube.
Next question is, what is the diameter of the area the system can cover around the scanning tube? Great question. So with our CI-600, the larger version of our imager, the diameter of the imager and the tube are about two and a half inches wide. And that will give you a slightly bigger circumference than you can imagine. With the CI-602, it has a bit of a smaller diameter at around two inches, and you’ll get a little smaller circumference that you can measure. Next question, can a machine learning model be written to automatically detect the roots from the soil background without doing the manual tracing of roots? Great question. So we, as I said, are currently in partnership with an AI company to hopefully make this possible. It hasn’t already been released or is not a part of the software because it’s very tough. With machine learning, you must add pictures of different root and soil variations and ensure they’re accurately mapped. So the software can know what it’s supposed to do, which takes a ton of data input. With this software, users cannot edit the code or mess with the software. But this feature is coming, and we are working on it because we know how time-consuming it is to sit here and trace out all of these roots.
Next question, what if I draw point data for the week three image and then go to week one? Are there changes in diameter? How depth does the soil need to place the tube? I’m not sure exactly what your question’s second part is. But if you draw points for the week three image, it won’t adjust anything you’ve drawn out on your week one or week two image. So that will stay the same. Whatever you’ve done on your previous session images will not be changed and will not be edited when you add new sessions, new pictures, or new tubes. Anything you’ve done on a specific picture will be locked once you move to a new one. The only option for editing those points between sessions is when you migrate root to a new session; then, you can edit those points. But as I said, it will not adjust any points you’ve drawn out on previous sessions.
Next question, I have to measure the seminal root angle. Can I use this software to measure seminal root angle? I already have an image of roots. Is it necessary that an image should be taken from your product? No. So like I said, you can measure and import any image you have. You do not have to use images from our CI-600 or CI-602. And yes, you can measure a root angle. So I only showed you a few times, but to measure root angle, you can draw out the parent root and then use that drag and select tool to drag and drop a branch onto that parent root, and then you’ll be able to see statistics about root angle. So only when you start connecting the root to that parent root will you see that root angle. When you export the data, you will get an estimated root angle of all the individual roots. So that feature, you cannot see that statistic in the software. Only once you export the data can you see the angle of single roots. And you’ll want to ensure you have that tube angle feature. You want to ensure you have the correct angle and depth so that those statistics are accurate.
Next question, can you save a trace roots scan from moving it into a PowerPoint presentation? Great question. Currently, we are not able to export the actual trace-out image, but kind of a workaround is just using the screenshot tool on your laptop. Or on Microsoft, I think it’s the snipping tool. So once you’ve traced out all of your root systems, you can take a screenshot of your webpage, which will save to your desktop, and you can use that for your PowerPoint presentation. Next question, can we also check very thick and dark roots? Yes. So the thickness of your roots should not matter. The illumination from the device uses LED, and so we’ve had really success with brown or dark-colored roots against the dark soil. When those LEDs illuminate, you can still clearly see a difference. And if you’re having trouble detecting the difference between dark roots and dark soil, you can also do some image adjusting before you import it into the software. As I showed you, we have those tools to change the image brightness, contrast, and gamma. But if that’s not enough, you can put your image into different editing software, adjust the colors and the contrast, and then import it back into RootSnap! So you have a clear image showing the contrast between roots and soil.
Next question. Is it compatible with UV, Vis, and NIR? So currently, our CI-600 and CI-602 are only using visible light. But as I mentioned, we are releasing a new version of this image, which is RCI-610. And with that version of this image, you’ll be able to use UV, Vis, and NIR wavelengths. So with the CI-610, you’ll be able to select specific wavelength ranges that you want, and you’ll be able to also select multiple at once. So if you want to take a UV, Vis, and NIR image with a single scan, you can toggle and select all those and get an image from all those wavelengths. But UV and NIR are only available on our CI-610, which will be released this year. Next question, can I use the root analysis software on 2D hydroponic images? Yes, for sure. So you, as I said, can import any image that you want if you’ve taken images with a different device or even with one of our images in your hydroponic system, you can import any image. It doesn’t have to be roots planted in the soil. It can be rooted in water or roots in any medium. You should be able to see a very clear contrast between that and be able to trace out all of your root systems. But, yes, you can import any picture that you might have from your experiment.
Next question, how can the system total area of the root if it will cover a small area around the scanning tube? Good question. So with this technology, the CI-600 and the CI-602 can only take visible images of roots and soil directly around the tube. So these tools will not give you a complete view of the entire root system. They will only give you a direct view of roots and soil around the tube. So one way to get around this is to have multiple tubes. So most, if not all, of our users have multiple tubes set up around single plants or all across that orchard. So if you need to understand what the entire root system of a single plant looks like, I suggest placing multiple tubes around that plant at various angles and positions. So that might be having six different tubes scattered around the perimeter of the root system that is all angled in. That might be adjusting the positioning of the tubes to be right in the middle of the root systems, but having multiple tubes will allow you to analyze all those images and then add all those statistics together to represent the entire root system better. But right now, we can only see roots and soil around the tube.
Next question, can image analysis extract stress-related parameters or indices? Again, another great question. So currently, with our CI-600 and CI-602, it’s just a visible light image. And the RootSnap! software is purely to trace out your root systems and get measurement statistics for that root. So there’s no option to analyze stress or disease or input any indices. But with our CI-610, we’re hoping UV, Vis, and NIR can correlate some pictures with different stress, disease, pigments, etc. On that note, we are looking, like I said, for beta testers currently looking at the effects of UV and NIR and how they can correlate those pictures with stress and disease response. So if you are one of those users or researchers or know of someone who would be interested in collaborating with us and testing out this device, please get in touch with us. We would love to hear what you’re doing and see if you might be a good fit to help us expand the applications for releasing our new imager.
Next question, is there any separate lamp replacement cabin or portion? So if there is an issue with the camera or LED lights on your device, please get in touch with our support team. The link for our support team is on our website, and they will either be able to remotely help you fix an issue with your device or have the device sent in and we’ll replace that camera or LED lamp for you. It should be an easy fix. And we always try to help our customers remotely before they have to send in the device. But please get in touch with our support team, and we’ll get back to you if you have issues. But currently, in the CI-600 and 602, the lights and the camera are all integrated into one device. They’re not separate pieces that the user can take apart. It’s all in that one device.
Next question is, can I import edited images with lines drawn? Yes. So if you have an image, as I said, you can import any image. So if you’re using another software to draw on your image or adjust the settings of the image, you can import any image you have. You can also reopen your project and continue to work on it. So if you only got through tracing half of your image and didn’t have enough time to finish tracing the other half, you can save and close the project, reopen it, and continue to draw out the roots. All the things you’ve done for that project will be saved, and you can keep adding to those. But, yes, you can import already edited images. Images with already roots drawn out.
The next question is whether that individual root angle gives us meaningful biological inference? So that depends on your research and the application of what you’re doing and what you’re trying to find out. You know, a lot of users like that feature, sure, because it can tell them different statistics about where the roots are leading in terms of the direction in the soil, which a lot of times can give users really meaningful information, especially if they have their experiments set up where there’s a high nutrient spot in the soil, where they’re watering specific parts of the soil. That branching angle, an individual root angle, can show you where the root is traveling to and what direction they’re pointing. But that does depend on your application and what kind of statistics you need to prove your conclusion or prove your point in your research.
Next question, what are the unique points of your detector over the competitors? So we pride ourselves in having completely non-destructive tools. We don’t want users to rip out their entire root systems. So some different ways that people analyze their root systems without these instruments are having to completely remove the entire root system from the soil, effectively killing your plant and disrupting the below-ground environment. And so we love that these tools can be completely non-destructive. And also that the clear acrylic tubes can be placed and left, so you don’t have to come back and keep digging holes, and it doesn’t take a lot of dirty work. You know, you have your clear acrylic tubes that are left out in the field or left in pots or planters that you don’t have to touch once you’ve installed them, which makes it easy and accessible for you to go out into the field and pop that imager down in the tube. We also love that these images are super portable. So I mean, honestly, I throw it in the cup holder side of my backpack, and it fits right in there, and then throw the laptop or tablet in my bag, and you’re good to go. It’s nice to throw it in your backpack; you don’t need a whole carrying case or a big box to move it around. Another unique point is that we have this compatible RootSnap! Software. So you’re able to take these images. And then, with software from the same company, you can analyze those root systems and get help with both your instrument and the software. So that’s a few unique points about CID Bioscience and our line of root and soil imagers.
Next question. I already have the tubes in the ground for use with one of your current root imaging models. If I buy the new CI-610, can I use it in the same tubes I already have, or do I need to install new tubes of a different diameter? Again, another great question. So with the CI-610, the CI-610 will be the same diameter and will use the same tubes as our CI-600, our wider diameter imager. So if you already have a CI-600 and tubes installed for that CI-600, if you want to purchase the CI-610, you would not need to get any more tubes. It will be the same size as the ones you already have installed. If you have CI-602, unfortunately, right now, the 610 will not fit in those tubes, but we’re hoping that once we release the 610, we can work on releasing another narrower version that will be able to fit in those 602, which are their smaller diameter tubes. But right now, only the 600 tubes will work with the 610.
Next question, can we connect these multiple images to have the whole aerial or complete root picture? So, there’s no physical option to connect the images within the software. But that’s what that windows option on the left-hand side of the screen was so that you can import multiple pictures from the entire tube length. So let’s say you have three pictures from a single tube. You can import all of those, the first, middle, and last pictures, and they’ll show up in a line on that window section. And then, once you trace out all those roots and export the data, it will average all the statistics for all those pictures at once. So instead of stitching the images together when you export the data, it will just average and give you the statistics for that entire tube. So all the images that you’ve traced out in that tube. You can also trace out all of your roots, take a screenshot of that picture, and then take screenshots of the other two pictures and use different software. Or place them right on each other to have a visual image of your trace-style complete root system.
Next question: does the angle setting 045 angles in the CI-600 affect any parameters of the roots? When you place your tube in the ground, you will want to note its angle and input that into RootSnap!. This is only important if interested in depth or branching angle statistics. You want to ensure that you have that angle setting accurate so that the root angle and depth statistics are accurate, but it will not affect any other parameters like diameter, length, etc. You only want to ensure you have that if you’re very interested in the depth and angle of the roots.
Next question, when do you anticipate the release of the CI-610? So we’re not sure exactly when we will release this right now. We want to ensure that this is a well-rounded product with an easy interface and can take images with UV, Vis, and NIR and do it well. So our engineering and application science teams are working hard to get this device and release it to everyone. But before we do that, we’re going to do all of our tests and do beta testing and make sure that it has all the functionalities that we wanted to. Right now, we’re hoping that maybe in fall 2023, it will be released. But please sign up for our early bird info so you get all of the information about when we will start beta testing and when the potential release will be.
Next question: Can we see bacterial root colonization using this software? Good question. So with the CI-600 and CI-602, it will depend on your image resolution. So like, I said, the CI-600 only goes up to an image resolution of 600 DPI, but the CI-602 goes up to 1200 DPI. So if you are a user or researcher interested in mycorrhizal interactions or looking specifically at root hairs, I suggest getting the imager with a higher image resolution. You’ll be able to zoom in and see what’s happening at a microscopic level. You might not be able to see all bacterial root colonization because it will be very small. But even with 600 DPI, I’ve had real success seeing root hairs and small differences zooming into the picture. So definitely suggest taking images with the highest image resolution possible.
And I saw that next question, can we measure root hairs? So like I said, ensure you’re using your device’s highest image resolution. But as you can see, the background image on the presentation right now, that image was taken using the CI-600 at 600 DPI. And you can see that even at this macroscopic view where I’m completely zoomed out, you can start to see some of those hairs on the roots. And then, once you zoom in, you can very clearly see this individual root, and you can even trace them out and map them out if you want to.
Next question, do you expect the images from the CI-610 to be different, more compact, etc.? So we’re not exactly sure yet. Hopefully, they’ll be the same type of image, but it will be; you’ll be able to see it from your mobile device, and you’ll be able to get an image from a visible light image like a UV image and a NIR image. We don’t know exactly what the size of those images will be yet or how they’ll be able to be transferred, like, what the size is. But it should be, you know, just like the CI-600 and the CI-602. You’re just taking a single image. But with the CI-610, you’ll get a video and a picture. So as it travels down the tube, it has a fisheye lens at the bottom, so you’ll get a video of the in the higher length of the tube, and then it will process those images into individual pictures.
Next question, is condensation a possible problem while taking pictures with the CI-610? If so, how should I handle this problem? So this is a possible problem for our whole line of images. So the CI-600, the CI-602, and then eventually the 600 or the 610. There are a few ways to combat this problem of condensation or soil particles getting inside the tube. So first, two watertight caps are on both ends when we ship the tubes to you. One is removable to slide the imager into the tube, but it’s connected to a film insert. So that film insert will take up the entire length of the tube. And we’ve added that to absorb any condensation that might seep through and get into the tube. We also have a microfiber cloth that we send with you in the box and a little metal rod that you can thread that cloth through. And then, stick it down into the tube and swab it along the side of the tube. So if you get any water condensation in there, as I said, you can use that microfiber cloth or use any soft towel to get in there and get that condensation off the sides.
Next question. If we cannot have the whole root image, we cannot have the root area or the total volume, and the customer will destroy the root to get this information and complete his research requirement? Yes. So like I said before, you’re only getting an image of the roots directly around the tube with these instruments. And so to combat this problem, you need to install multiple tubes around your root system to capture as much of the root system as possible. It’s impossible to non-destructively get an image of the entire root system with these devices, but as I said, you can install multiple tubes. If you are a user or a researcher that has to look at the complete root system, you would need to use a different method, whether a destructive method or a different device.
Next question, how much is the overlap between two sequential depth images? So this will depend on how far the user pushes the device down into the tube. So like I said, these metal rods come with your imager. And they are the exact length of one tube length. So as you connect more and more, we tell users that first, you’ll start the image at the top of your tube. And then you’re going to take that rod and push it down to exactly where the top of the image was before. And so this is to make sure that you can note the length of your tube and get an image of the entire length. But that overlap between images will depend on how far the user pushes the imager down the tube and the accuracy of where they’re taking the images. But if you mess up and notice some overlap in your images, you can always adjust the size of your images. So crop them and import them into the software like any other image.
Next question, is there a need possibility to configure or calibrate the measurements if the software is used with your pictures? So there’s no need to configure or calibrate. You might have to adjust the resolution of your picture if you’re using an image that’s not from our device, but there’s no need to calibrate or configure anything. If you’re unsure about the measurements, we have that manually measured tool in the soft where you can quickly drag it over the length or width of your root and then draw your root system and compare those two. But there’s no need to calibrate or configure any software parameters to make it work with your pictures.
Next question, how would the system work in a cold or frozen environment? Great question. So these devices have a pretty broad range of operating temperatures. We have users using this device in frozen Tundras in the Arctic. Once you install your clear acrylic tubes, it’s just a place-and-leave type thing. And the tubes will be fine in pretty much any temperature. If you’re worried about a specific environment or operating conditions, you can always contact us, and we can determine if this will be a good fit for you. But we have users using these devices in a very broad range of temperatures, from frozen to very hot and humid environments.
Next question, can one estimate root biomass from images using the software? So a few statistics in the software can be used to correlate root biomass. Once you’ve drawn out all of your roots in your picture and exported the data, you will get an average value of root density and mass, and you can also estimate the root percentage of how much the root was taking up in your picture. And you can correlate that to root biomass. As I said before, you won’t be able to get the circumference or anything of these roots because it’s just a visible light image. But you can get pretty good density, mass, and even percentage statistics from your picture.
So that looks like all of the questions that we have today. Thank you, everyone, for joining us for our RootSnap! live demo. Please look out for information from us on our CI-610 release. And if you want to receive a quote or information about any of our products, use this link at the bottom of the presentation. And you can always reach out to our support team via our website or make time with one of our application scientists again with the link on our website. Thanks, everyone. Hope to see you at our next webinar.
Related Products
Most Popular Articles
- Transpiration in Plants: Its Importance and Applications
- Leaf Area – How & Why Measuring Leaf Area…
- How to Analyze Photosynthesis in Plants: Methods and Tools
- Plant Respiration: Its Importance and Applications
- The Forest Canopy: Structure, Roles & Measurement
- Stomatal Conductance: Functions, Measurement, and…
- Forest & Plant Canopy Analysis – Tools…
- Root Respiration: Importance and Applications
- 50 Best Universities for Plant Science
- The Importance of Leaf Area Index (LAI) in…